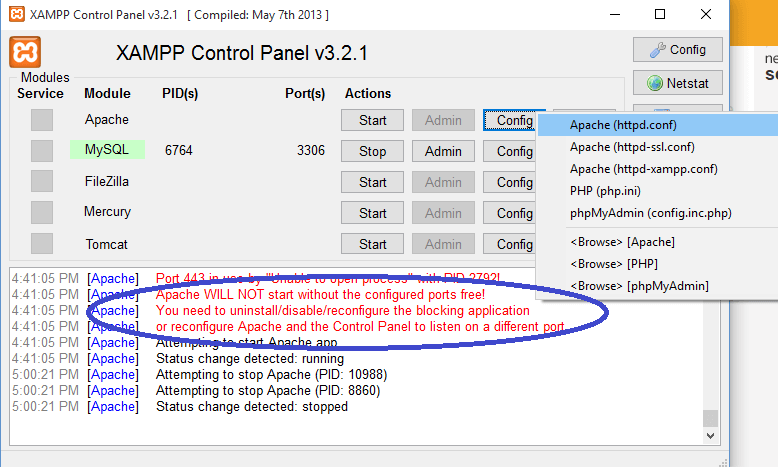
If you get one of these errors when you try to start Apache after downloading Xampp:
“Apache WILL NOT start without the configured ports free!”“Reconfigure Apache and the Control Panel to listen on a different port.”
Don’t worry; this happens to most the people that install Apache on their home computers.
It happens because Apache by default listens on port 80 when you install it. Unfortunately, many programs listen on that port as well. For example, Skype is one of the programs it comes up automatically listing on port 80. So, if there is anything on your computer that’s listening in on port 80 Apache will not start. Therefore, you need to change Apache to listen to some other port.
All you have to do is follow these simple steps, and you can change Apache’s port from 80 to port 8080. At the same time, you will also be changing Apaches SSL port from 443 to 4433:
first step
Press on Apaches “config” button and click “Apache (http.conf)” and a notepad will open.
Your Dream Website Awaits!
second step
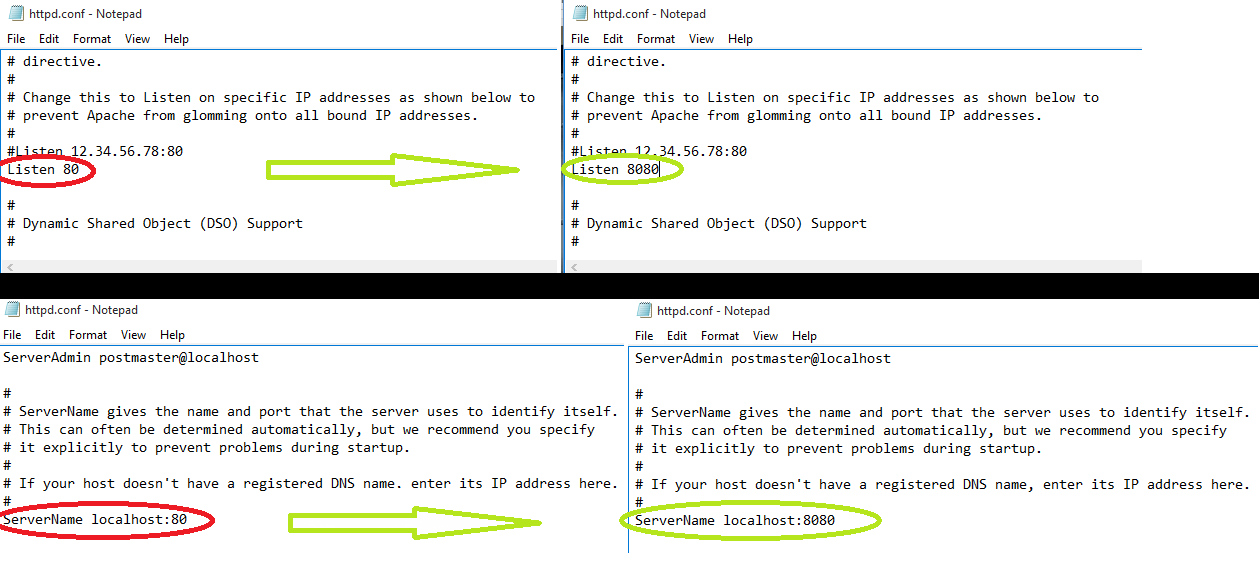
In the open notepad, you will have the ability to change Apache’s port, search for “listen 80” in the document and change it to “listen 8080,” also search for “ServerName localhost 80” and change it to “ServerName localhost 8080.” This will change Apache’s port from 80 to 8080. Press Cntrl+S or click file>save for saving the changes you have made and exit the notepad.
third step
go back to the control panel, this time you will open a different file. Press on Apaches “config” button again and click “Apache (httpd-ssl.conf)”, another notepad will open.
forth step
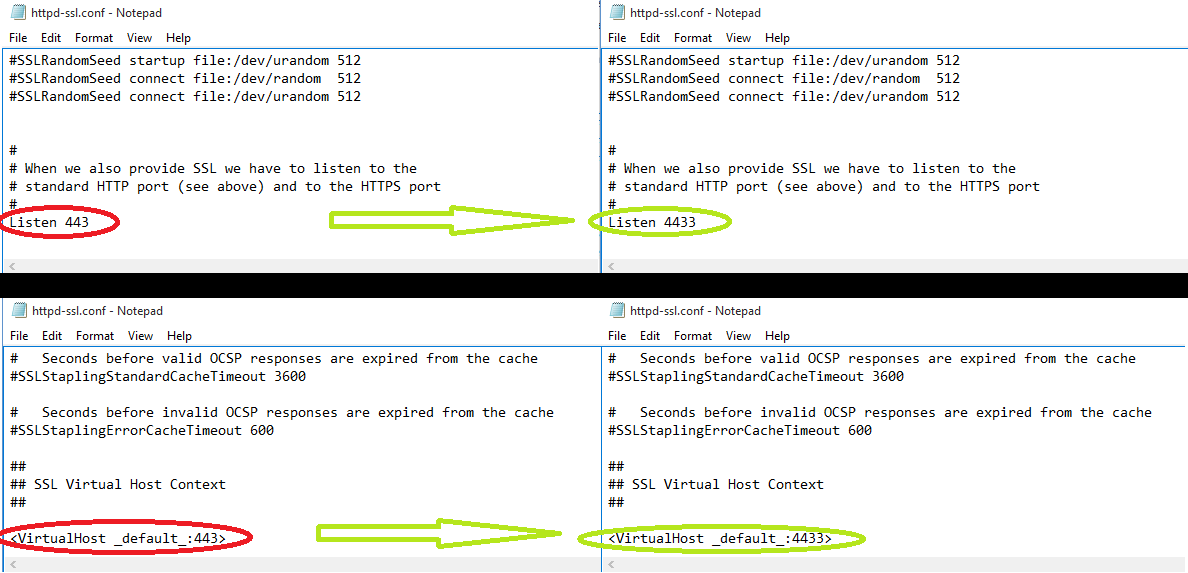
Now you need to change Apaches SSL port, search for “listen 443” in the document and change it to “listen 4433”, also search for “” and change it to “”. This will change Apaches SSL port from 433 to 4433. Again, press Cntrl+S or click on file>save save the changes you have made and exit the notepad.
Now you can go back to the Xampp control panel and click “start” Apache.
Did it turn green?
Excellent!
Now you have the whole Xampp package up and running. You are now ready to install the WordPress files on your brand-new local server or test your PHP code.
So, until next time…

